Sunday, April 17, 2011

wedding mustache


Wedding...Moustaches?

Dave had a cute wedding photo idea today. Now, bear in mind that he doesn't read wedding blogs or magazines like I do. He came up with this one all on his own, unlike my ideas, which are usually 'inspired' (i.e. copied) from things I see elsewhere.

He said: 'you're probably not going to want to do this, but I think we should get some of those plastic glasses with the fake moustaches and noses to take a few silly photos with.'

That's totally fine with me. Apperently it's a 'thing' (trend) anyway, and I've seen some cute wedding photos where couples do this:

The Knot

Studio Thought Sauce

Red Photo Co
Just thought I'd share!

paper rosette decorations


Rosette-papersourceWe love Paper Source, and we love free pattern downloads. The math's pretty simple, then -- we really love this paper rosette project from Paper Source (pdf).

All you need is some nice 8 1/2" x 11" paper and pretty ribbon or string (Paper Source is great for both) to make these sweet and simple rosettes. The project doesn't involve much more than folding sheets of paper accordion-style -- no scissors required! -- so grab your nieces and nephews or the neighbor kids and make a fun afternoon of it.

The finished products will look gorgeous hung from trees for an outdoor wedding, or on the supports of an outdoor tent. For an indoor affair, hang the rosettes from the ceiling at different heights or off the centerpieces.

Pom poms


PomOur favorite way to add some major interest to your reception or ceremony without much time or fuss: big paper pom-poms!

You can start from scratch and make the entire project on your own (it only takes tissue paper and pipe cleaners or string), or order a pre-made pom from a vendor like PomLove on Etsy and just deal with the final steps.

To make them on your own, start with a stack of about 10 sheets of tissue paper. The diameter of the finished pom-poms will be a few inches less than the width of your sheets. From top to bottom, fold the entire stack accordion-style, making each section about an inch and a half tall (this will be the width of each individual piece of the pom). Once the entire thing is folded, wrap string, wire or a pipe cleaner around the middle of the now long and skinny piece of tissue paper. Then, use a pair of scissors to round off or cut each side into a point.

If you decided to order your pom-poms, here's where your work will start. (The product you receive in the mail will probably look a lot like what we just made). If you're working from scratch, just keep following along. Starting on one end, gently pull the top of each piece of paper toward the center. Work one sheet at a time, and fluff out the paper as you go. When you're halfway through the stack, start pulling the sheets in the other direction so you create a half-sphere. Do the same with the paper on the other side to finish out the sphere.

Mason jars lights - beautiful

http://www.kootoyoo.com/2010/07/how-to-make-pretty-girly-lights.html

How to make pretty lights…

July 27, 201048 Commentsby Kirsty
Light Group
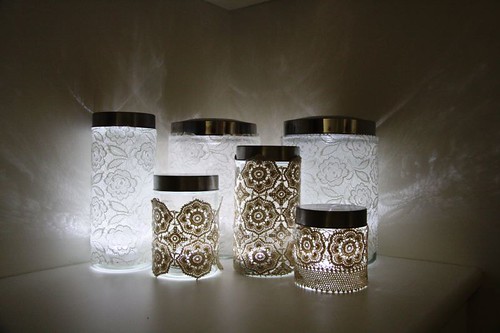
Ambient light in 5 minutes flat!
The jar lights I made created quite a bit of interest.
The benefit of using LED lights over tealights is safety & if you’re having an outdoor party you don’t need to worry about weather as the light would of course be protected by the lid of the jar.
Edit: I used large jars which were purchased very cheaply from a homewares store but used kitchen jars would work too. If you want uniformity with the the lids then perhaps a coat of paint?
The LED battery operated lights that I used were purchased from Bunnings. They are OSRAM brand “Dot-it” lights. They are around the $10 mark but they do just go on & on & on. I’ve also seen them at lighting shops.
I’m seriously considering setting up something in the garden similar to this brilliant piece of garden art…
which was inspired by Margie’s project here.
Of course, you don’t really need a how to…it’s a speed demon type project. Forge ahead, have a crack & you can’t really go wrong.
& because I wanted to try out the embed feature through Google Docs…
you just need to click the little icon in the top right (open in new window) if you want to print the pdf.

Mason Jars


30SEP
Another suuuuper easy project that barely needs any explanation, but has a high cuteness factor. We love mason jars, hands down. But like anything, when you see them constantly, you start to wonder when something new will come along. We don’t have anything new per se, but we do have an update that takes the mason jar, or whatever glass container you want to use, to a new level of cuteness.
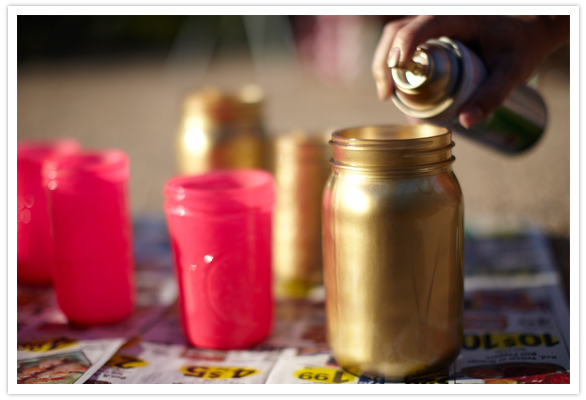
And the magic tool? SPRAY PAINT!!! It’s become one of our very very favorite craft supplies as of late. (Pls ignore environmental and health impact of aerosol).
Supplies:
Mason jars or other glass containers
Spray paint
Masking tap (if you want to get serious about keeping the edges of the jars clean)
Again, this really doesn’t need detailed instructions. You just set your jars outside on some newspaper and spray the inside of each jar until it’s well coated.
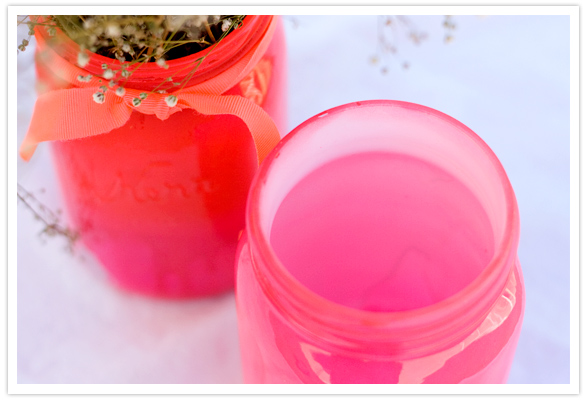
The only thing we want to make sure to point out is that some colors aren’t completely opaque. Which means when you fill them with water and flowers (and florist foam if you’re using it) the color will be darker than you planned, since you’ll be able to see the stems and water through the paint.
BUT, we have a solution that we only figured out once we were in the middle of arranging our flowers. If you choose a semi-transparent color (like the hot pink we’re showing), add a second coat of opaque white spray paint to the inside after the color coat is dry. We tested it after the fact and it works perfectly. Yay for solutions!
And one final tip… when you’re arranging your flowers, be careful not to scrape the inside of the jars with the stems. The paint will come off!
Happy spraying, crafters.
Top two photos by Scott Clark.
Related Posts with Thumbnails
35 comments
  • Tweet This!
  • Email to a friend

Wine Bottle Centrepieces


DIY Wine Bottle Centerpieces

Dy_winebottles_655

We've seen loads of mason jar centerpieces -- but making wine bottles look chic? Now that's another story. These minimalist centerpieces have plenty of style, even without tons of flowers. Here's how to try the look:

Start saving your empty wine bottles now. Soak them in hot water and a little dish soap to easily remove the labels. (Or, if you're going for a more rustic feel, buy wine from only one country, like France or Italy, and leave the labels on as part of the look).

But maybe the best part about these centerpieces is that you won't need to buy a lot of flowers for them to look fabulous. Like these calla lilies, any long stem, large blossoms (sunflowers, roses, or orchids) will look great on the table. Use only one to three flowers per bottle to keep the minimalist look.

Want more DIY ideas? Check out 100s of DIY photos in our gallery.
by Kendall Pfeffer

DIY chalkboards

http://www.mydiyweddingday.com/2010/07/a-new-diy-use-for-chalkboards.html

Do it yourself chalkboards


A New DIY Use for Chalkboards

Chalkboards_655

For a cute eco-friendly twist to your wedding, try using huge chalkboards instead of paper! (Not only is this DIY, but it's super wallet-friendly as well.) Instead of printing out a menu per person and leaving notes all around with instructions for the guests, use your own chalkboards to display the menu and point out signs like the guest book, dessert bar and photographer's station.

Here's the DIY instructions:

Choose a large piece of flat wood, metal or plastic, and frame it in any size you'd like. (Large frames work best for listing table assignments and the menu, but a small frame is can be used to label the guest book. Frames can be anything from a typical cork-board frame to an ornate picture frame, depending on your style. Our favorites shown here use a window frame, propped up canvas and a simple wooden frame.) Clean the surface thoroughly before applying the paint so that dust and residue don't bubble. Cover the surface in chalkboard paint (sold at Lowes.com and HomeDepot.com) applying each layer with a thick paintbrush and waiting for it to dry before coating the entire surface again.

Once completely dry, you can add additional special touches by decorating the frame with your names or the date or by adding flowers and ribbon to the border. Write with chalk onto your brand new chalkboard either by hand or with large stencils and place them around the wedding. (The chalkboards wipe clean with either a soft cloth or soap and water for reuse!)